Showing posts with label Linux Tutorial. Show all posts

Tuesday, 30 July 2013

Install NVIDIA Drivers On Kali Linux

This document explains how to make use of NVIDIA video hardware and install the drivers on a Kali Linux system.
The first step is to fully update your Kali Linux system and make sure you have the kernel headers installed 

apt-get update && apt-get install -y linux-headers-$(uname -r)
Next, download the latest NVIDIA driver for your architecture and video card here. To locate your NVIDIA card model, execute the following command.

root@kali:~# lspci | grep -i vga
02:00.0 VGA compatible controller: NVIDIA Corporation GT218 [GeForce G210M] (rev a2)
03:00.0 VGA compatible controller: NVIDIA Corporation C79 [GeForce 9400M G] (rev b1)

The next step is to disable the nouveau driver. Nouveau is a open source NVIDIA driver project, however it lacks the 3D graphics acceleration needed to run Cuda pentest tools.
sed 's/quiet/quiet nouveau.modeset=0/g' -i /etc/default/grub
update-grub
reboot
Once the system has rebooted and you are looking at the GDM login screen, press CRTL+ALT+F1 in order to get to a TTY, which will be a black screen with a login prompt. We need to login as root and stop the gdm3 service as follows.
service gdm3 stop
If you are on a 64-bit Kali system, you may want to install the ia32-libs package in order to allow the NVIDIA installer to install the 32-bit libraries, although this is optional. If you choose not to do it, simply select no when the installer asks if you want to install the 32-bit libraries.

dpkg --add-architecture i386
apt-get update
apt-get install ia32-libs
Assuming you downloaded the NVIDIA driver to your /root/ directory, we need to give it executable permissions and run it.
chmod 755 NVIDIA-Linux-x86_64-310.44.run
./NVIDIA-Linux-x86_64-310.44.run
Once the installer finishes, you should reboot your machine. Once the system boots back up, you may see a NVIDIA splash screen, which will indicate that the drivers installed correctly, however, this is not always the case. In order to check if the drivers are working properly, execute the following command.

root@kali:~# glxinfo | grep -i "direct rendering"
direct rendering: Yes
Although utilizing the Cuda tools included in Kali is beyond the scope of this article, checking to make sure that they are working properly is always a good idea. The following command uses Oclhashcat-plus with some of the example files included in the package.

cd /usr/share/oclhashcat-plus/
./cudaHashcat-plus.bin -t 32 -a 7 example0.hash ?a?a?a?a example.dict
cudaHashcat-plus v0.14 by atom starting...

Hashes: 6494 total, 1 unique salts, 6494 unique digests
Bitmaps: 16 bits, 65536 entries, 0x0000ffff mask, 262144 bytes
Workload: 256 loops, 80 accel
Watchdog: Temperature abort trigger set to 90c
Watchdog: Temperature retain trigger set to 80c
Device #1: GeForce G210M, 511MB, 1468Mhz, 2MCU
Device #2: GeForce 9400M G, 253MB, 1100Mhz, 2MCU
Device #1: Kernel ./kernels/4318/m0000_a1.sm_12.64.ptx
Device #2: Kernel ./kernels/4318/m0000_a1.sm_11.64.ptx

Generated dictionary stats for example.dict: 1210228 bytes, 129988 words, 129988 keyspace                    

27b797965af03466041487f2a455fe52:mo0000    
a48dd0f09abaf64324be83ce86414b5f:ap2300000  
7becb9424f38abff581f6f2a82ff436a:sail00    
1459ccf0940e63051d5a875a88acfaaf:pigi00    
3baa3048651a65d1260eb521ab7c3bc0:ek110      
7a7a8220266f71f54f85685969ce999f:davi0123456789
98c627ca129e64dfff3bf08fbaab6c86:fire01man

As you can see in the output above, the cards are recognized and the passwords are being recovered successfully.

Source : http://docs.kali.org/general-use/install-nvidia-drivers-on-kali-linux

Monday, 29 July 2013

Malys-ex icons for Ubuntu 13.10/13.04/12.10/12.04/Linux Mint/Ubuntu Derivatives

Install Malys-ex icons in Ubuntu 13.10 Saucy/Ubuntu 13.04 Raring/Ubuntu 12.10 Quantal/Ubuntu 12.04 Precise/11.10/11.04/10.10/10.04/Linux Mint 15/14/13/12/11/10/9/and Ubuntu Derivatives

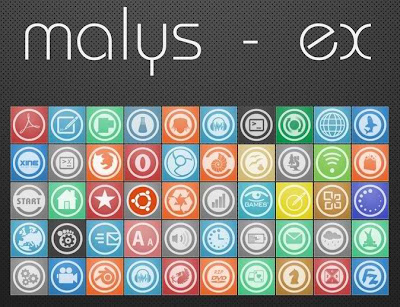
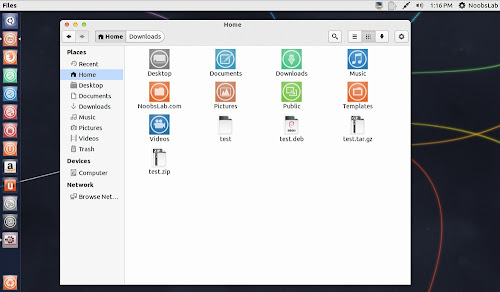
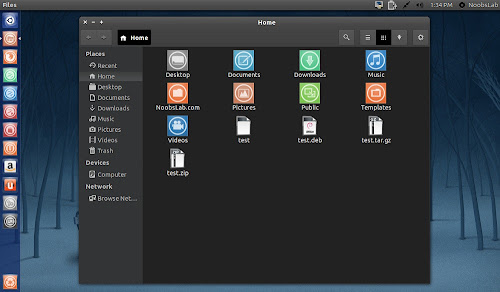
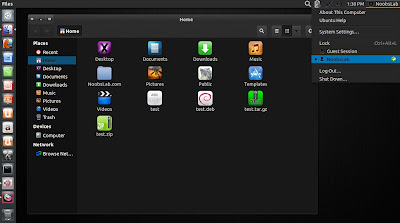
Malys-ex icon set is designed by Malysss from deviantart, He also made Uniblue and Uniblack icon sets. These icons are well designed, colorful and squared shaped icons, This icons set can fit with any kind of light or dark theme. Also checkout icons collection.
You can use Unity Tweak Tool, Gnome-tweak-tool or Ubuntu-Tweak to change icons.
malys icons

malys icons

malys icons

To install Malys-ex icons on Ubuntu/Mint open Terminal (Press Ctrl+Alt+T) and copy the following commands in the Terminal:
  • sudo add-apt-repository ppa:noobslab/icons
  • sudo apt-get update
  • sudo apt-get install malys-ex
That's it

Delorean Dark theme for Ubuntu 13.10/13.04/12.10/12.04/Linux Mint/Ubuntu derivatives

Install DeLorean-Dark theme on Ubuntu 13.10 Saucy/Ubuntu 13.04 Raring/Ubuntu 12.10 Quantal/Ubuntu 12.04 Precise/Ubuntu 11.10/Linux Mint 15/14/13/12 (Gtk3 + Gnome Shell + Cinnamon + Xfce4)

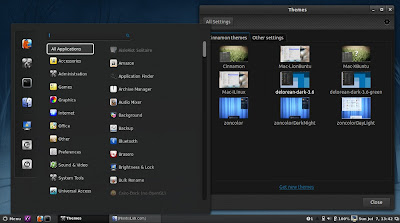
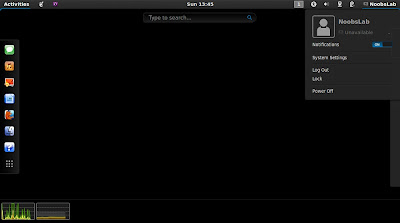
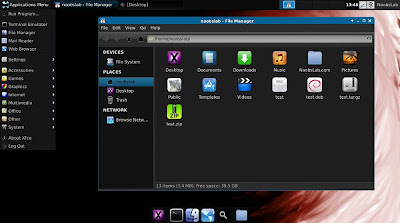
DeLorean-Dark for those who like dark themes, This theme is available for Gnome Shell+GTK 3.4/3.5/3.6/3.8. I tested this theme with Gnome Shell 3.8/3.6 + Gtk 3.8/3.6 and it works perfectly. Theme developer released final version but there can be some bugs, if you found any bug report to developer via source link. This theme is available in two colors blue and green, and it is also available for Xfce4, Cinnamon environments, Which is included in package and you can install it via ppa.
GTK 3.6 version
delorean dark theme


GTK 3.8 version
delorean dark theme


Cinnamon version
delorean dark theme


Gnome Shell version
delorean dark theme


Xfce4 version
delorean dark theme

1st: Download black wallpapers
2nd: iLinux icons used in screenshots. Also checkout icons collection,
3rd: You can use Unity Tweak Tool, Gnome-tweak-tool or Ubuntu-Tweak to change theme/icons.

To install DeLorean-Dark theme on Ubuntu/Linux Mint open Terminal (Press Ctrl+Alt+T) and copy the following commands in the Terminal:


That's it

How to Install Linux on the Zealz GK802: A Quad Core A9 ARM on a Stick

The Zealz GK802 looks a bit like a long, over-wide USB pen drive. Under a removable clip at one end of the stick is a male HDMI connector ready to be plugged directly into a monitor or large TV. On the other end of the stick are two USB ports: a micro USB to supply power to the GK802 and a female USB connector to let you attach peripherals like a keyboard, mouse or hub. Being a small, contained stick with an HDMI connector the obvious use for the GK802 is consuming video media.
gk802 ARM board
Inside the GK802 is a quad core Freescale i.MX 6 CPU at 1.2Ghz sporting 1GB of RAM and a Vivante GC2000 GPU.
Inside the GK802 is a quad core Freescale i.MX 6 CPU at 1.2Ghz sporting 1GB of RAM and a Vivante GC2000 GPU. The GPU and video decoding acceleration of the GK802 are supported under Linux. Getting information to and from the GK802 is done over Wi-Fi and you can connect bluetooth devices to it in order to control the GK802.
Looking at the side of the GK802 you will see a microSD slot. A card clicks into place there contained well inside the GK802. If you remove the two screws near the HDMI plug you can slide the GK802 open, probably voiding your warranty in the process. Flipping over the GK802 you will see a second, internal microSD card which contains the Android image that came with your GK802. My unit came with an 8 GB Sandisk class 4 internal microSD card which contained Android 4.0.4.

How to Install Linux

In order to run a Linux distribution like Ubuntu, Debian, or Fedora on the GK802 you will likely have to open the hardware and change or modify the internal microSD card. If you want to do that you should only have to open it up once, permanently inserting a microSD card in the internal slot that instructs the device to boot from its externally accessible microSD card.
There are two parts to getting the boot to happen. First, install a customized uboot at a fixed location on the microSD card. Then setup a boot.scr file on the externally accessible microSD card telling uboot where to find the Linux kernal and start the ball rolling.
For testing I extracted the Xubuntu 12.04 root image and slightly modified the boot.cmd file to use 1080p as shown below. As you see in the example the boot.scr file is generated from the boot.cmd file using mkimage. Note that I was still booting off the internal microSD card slot. The dev/mmcblk0p1 line and the mmc and dev references in boot_normal need to change slightly if you are using this configuration on a card that will be inserted into the external microSD slot.
root@gk802:/# cat boot.cmd
setenv root '/dev/mmcblk0p1 rootwait'
setenv rootfstype 'ext4'
setenv kernel 'uImage'
setenv video 'mxcfb0:dev=hdmi,1920x1080M@60,if=RGB24'
setenv extra ''
setenv boot_normal 'setenv bootargs console=${console} root=${root} rootfstype=${rootfstype} video=${video} ${extra};  mmc dev 0; ext2load mmc 0:1 0x10800000 /boot/uImage; bootm'
root@gk802:/# mkimage -A arm -O linux -T script -n "boot" -d boot.cmd boot.scr

Testing Video Playback

gk802 mini PC out of the box
The GK802 out of the box looks like an overly wide USB pen drive.
Attempts to playback 720p video under Android 4.0.4 didn't work using XBMC. The same 720p files played back fine under Xubuntu using Totem. To stretch things on my Xubuntu install, I played the 1080p h264 version of Big Buck Bunny. I got a few stutters initially (around where the title of the movie appears) so copied the file to a local microSD card to retest. Playing from the microSD card, after one initial stutter I got clean playback, even during fast motion scenes. The GK802 was across the room from a D-Link DIR855 access point. Clearly network configuration, distances, and caching play a role when streaming 1080p content to a GK802 over Wi-Fi.

At idle with a 1080p desktop shown, the GK802 uses 3.1 watts. With 1 core at 100% power usage jumps to 3.8 watts. Compiling openssl using 4 cores power usage went up to 6.6 watts. OpenGL was a mixed bag, much of glmark2-es2 run in about 5.5 watts. The effect2d needed 7.6 watts. Toward the end of the OpenGL test I touched the GK802 and it was very hot to the touch.
Tune in next time for benchmarks on the GK802. A special thanks to Miniand for supplying the review hardware for this article. The Linux kernel for the GK802 is available on github. And the IRC channel #imx6-dongle on freenode. Documentation for the Freescale i.MX 6 is also available.

Install Gotham Conky in Ubuntu/Linux Mint/Debian/Other Linux Version

Install Gotham Conky in Ubuntu 13.10 Saucy/Ubuntu 13.04/Ubuntu 12.10/Ubuntu 12.04/Linux Mint 15/14/13/Debian/Any Ubuntu & Mint verion/and Ubuntu derivatives

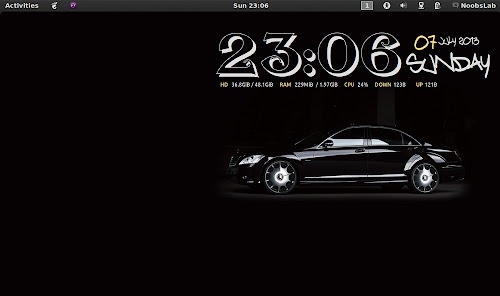
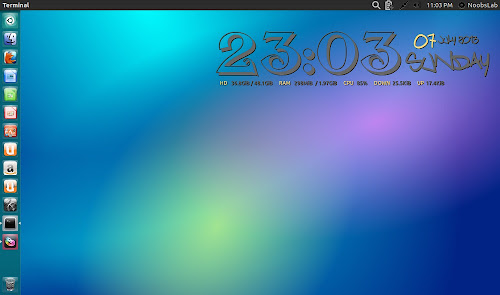
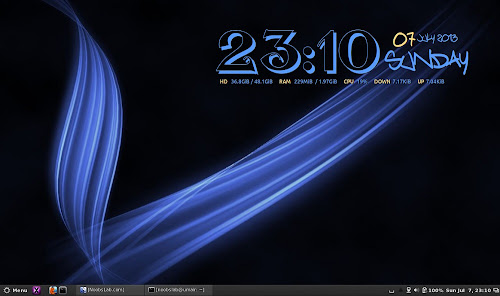
Previously NoobsLab shared other Conky widgets for linux desktop to make desktop nice. So today brings Gotham conky for you, Basically this conky was available for some environments but NoobsLab provides after modification for all Linux desktops like (Gnome Shell, Unity, Cinnamon, Gnome Classic, Mate, and others) and also for Ethernet and Wifi. Gotham conky shows CPU usage, Memory usage, HDD usage, Net up and down speed, and Current PC Time + Date.
gotham conky


gotham conky


gotham conky
What's new:
  • Automatically adds to start-up.
  • New fonts used, looks pretty cool.
  • Now gotham conky available in three colors. Ability to change colors anytime from setup.
  • Works in all environments, options to choose between environment.
  • Added option to choose between ethernet and wifi

To install gotham-conky in Ubuntu 13.10/13.04/12.10/12.04/Mint 15/14/13 open Terminal (Press Ctrl+Alt+T) and copy the following commands in the Terminal:


After installation logout and login back then must open "conky setup" from menu and setup your conky by following instructions then again logout and login back.

To install gotham-Conky in Previous Ubuntu/Linux Mint/Debian/and related Ubuntu derivatives open Terminal (Press Ctrl+Alt+T) and copy the following commands in the Terminal:


To uninstall use following command in Terminal:


That's it

Source: http://www.noobslab.com

How to Replace the Unity Desktop on Ubuntu Using apt-get

It seems to be popular these days to vilify Ubuntu as a distro because of the recent change to the Unity desktop.  We are told the change was made for the purpose of re-creating Ubuntu in the form of a gadget-agnostic operating system, equally usable and familiar on a phone, a tablet, and a desktop.  Never mind that each of those digital devices was invented to serve a need that at the time was unfulfilled by the others, or that their screens are radically different in size.  They must look as though they are members of the same family.
UbuntuLogoTo that degree, I'll gladly place myself firmly in the camp of the vilifiers.  I don't like the idea, I have no intention of making use of it, and I am certainly not convinced that it will bring hordes of new users to Linux.  But I am not one of those who claim that because of these changes Ubuntu is no longer a suitable distro for a Linux fan, that it is too commercial, that it does not have the flexibility a Linux distro should have.

Granted, I am certainly not one of the hard-core retired Unixers who think in C++ and regard a GUI as a crime against humanity.  Though I've been Windows-free and using various Linux distros for four years now, I still work more in GUI than CLI, and in my view the fundamental structure of Ubuntu is sound, adaptable, reasonably stable, and easy to shape into a form one likes.  You just have to dig down one layer below the Unity desktop to do it.

Install a Unity Alternative

That, of course, is almost embarrassingly easy, since relief from the oddly-structured constraints that Unity imposes on your work habits is only an apt-get install away.  Do you like an extra-light desktop?  Use 
apt-get install lubuntu-desktop 
Love wobbly windows and a transparent cube with all six faces in use?  
apt-get install kubuntu-desktop.  
Something between those extremes, just clean and powerful?  
apt-get install xubuntu-desktop.  
On your part, all you are required to do is twiddle your thumbs while the necessary packages are downloaded and installed, and when it's done you can log in to a very different experience than Unity offered you.  Furthermore, if what you installed on your computer was the full Ubuntu version, all the software it included is still accessible to you through your new desktop.  For example, in the modest, nearly bare-bones Lubuntu menu, click on Other: you will see a list of available programs and utilities that runs well beyond the height of your monitor. 
For that matter, if you are even more CLI-averse than I am you can get any of those desktops from the Software Center; it's just that the downloading and installing process from the Software Center runs as a deep, dark mystery, showing only a progress bar up in the corner of the screen.  The apt-get process remains fully visible on the terminal – what you see is what you get.
It's really a shame – there is so much more to Ubuntu than the Unity desktop would suggest.  It is, in its basic form, simply a variant of Debian, fitted out with a highly simplified installation scheme and privy to an extensive repository of programs and applications.  I just cannot understand the logic behind placing all those restrictions on the behavior of Ubuntu that the Unity desktop seems to require, when such rich variety is available otherwise.
Source : http://www.linux.com/

Twitter Delicious Facebook Digg Stumbleupon Favorites More